
Use tight geofences, local dayparts, and motion-state triggers to cut wasted plays and boost targeting on moving ad screens.
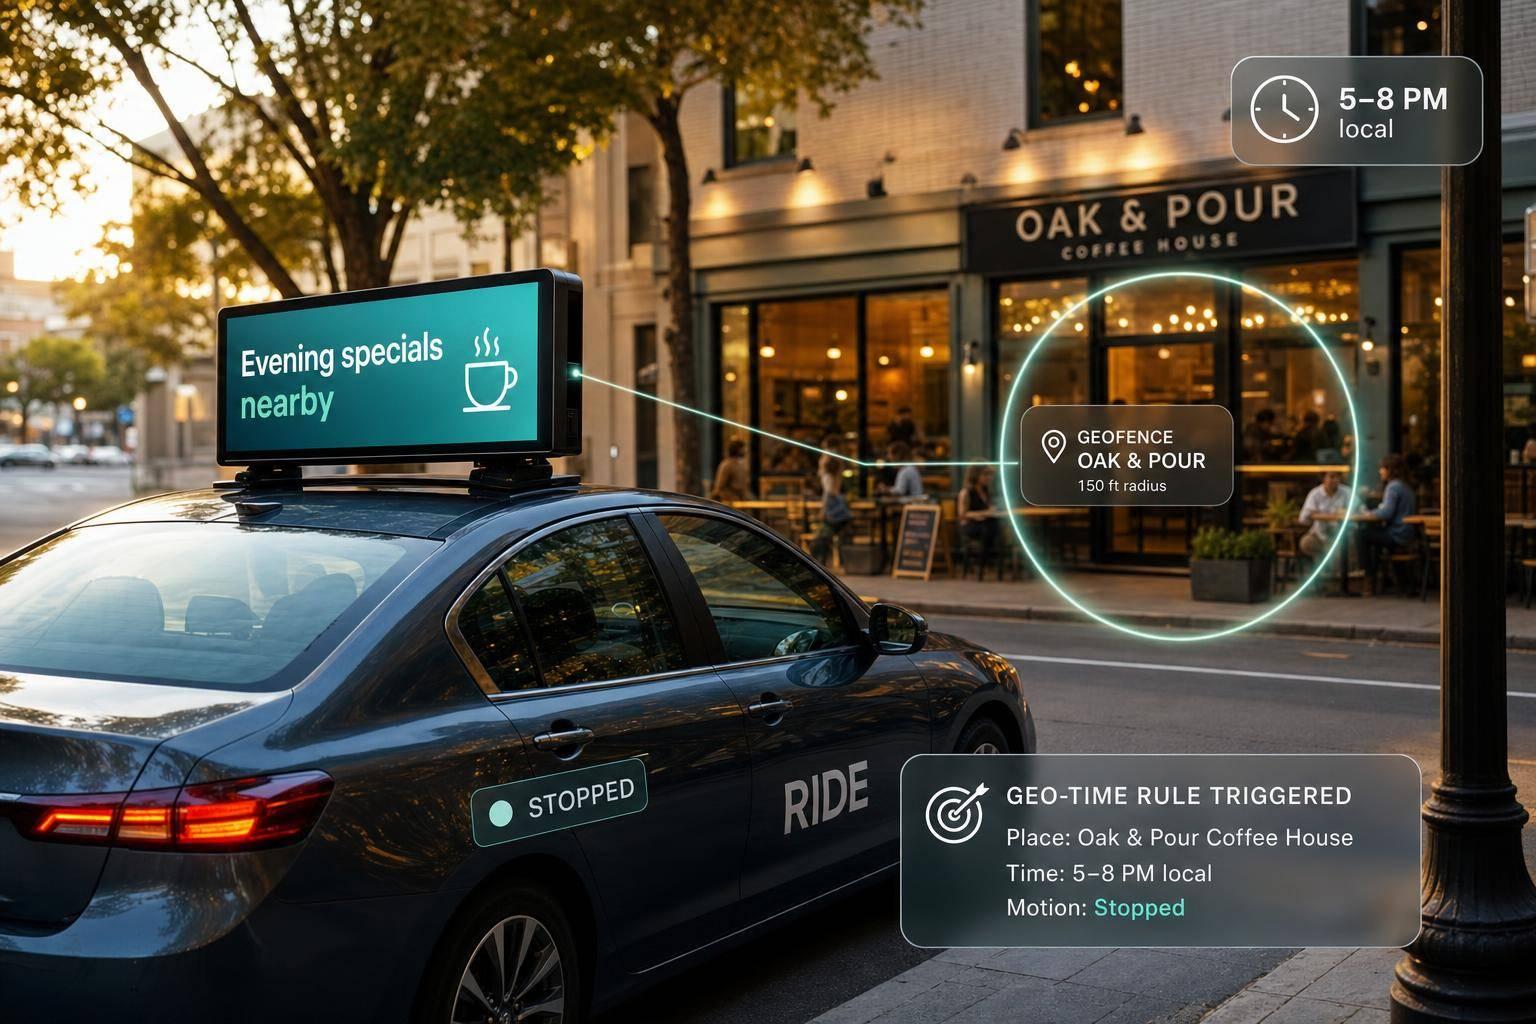
If a moving ad screen uses only location, it will waste plays. I’d use three rule layers at once: where the vehicle is, what time it is, and whether the vehicle is moving, idle, or occupied.
Here’s the short version:
A few numbers stand out right away:
What I take from the article is simple: better control comes from stacking small rules. A screen should not play just because a car is near a target area. It should play only when the place, time, and motion state all match.
If I were explaining the full article in one line, I’d say this: map the right zones, set local schedules, tie playback to motion, and verify every trigger with field testing and reports.
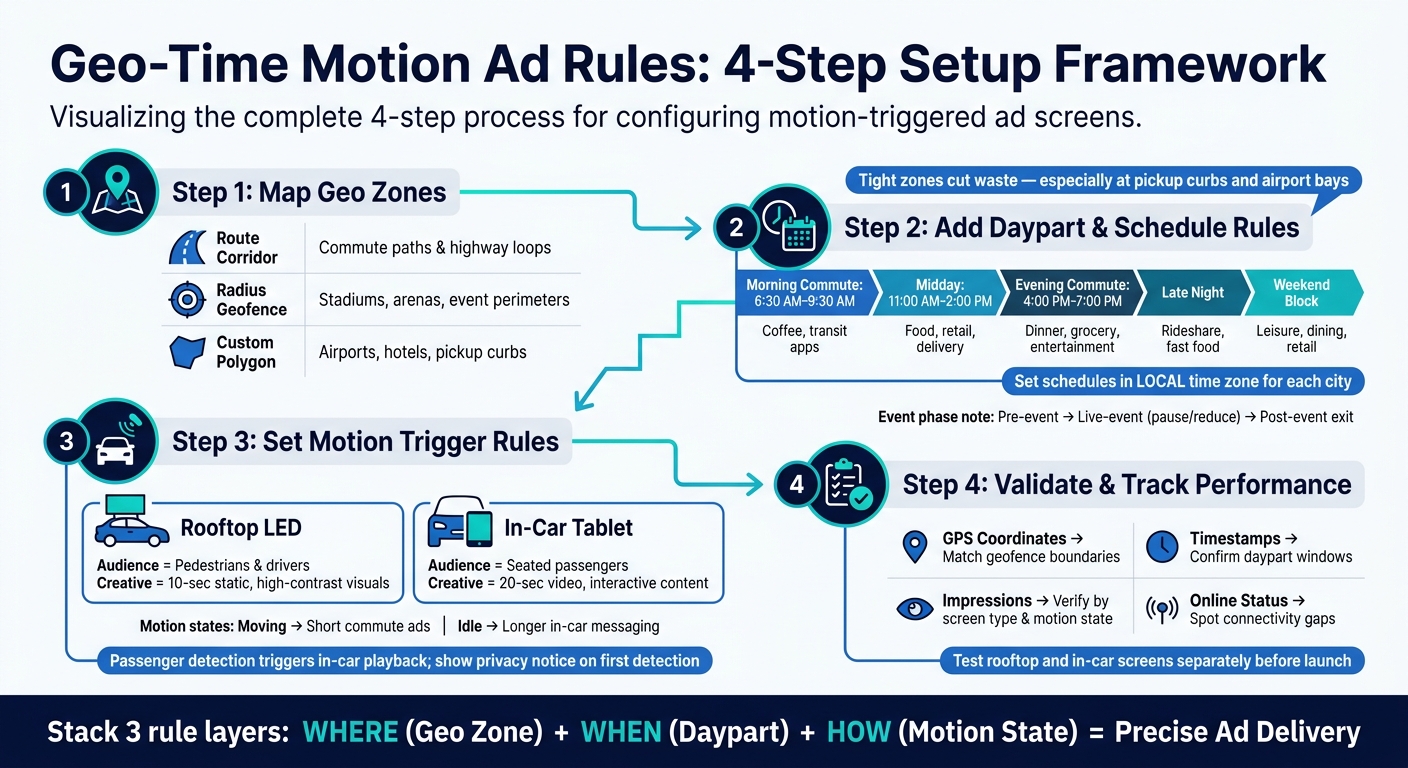
Geo-Time Motion Ad Rules: 4-Step Setup Framework
Before you touch schedules or motion rules, decide where each ad can run. In most campaigns, three zone types do the job: route corridors, radius geofences, and polygons.
That matters because rooftop and in-car screens don’t stay in one place during a shift. They move across different streets, neighborhoods, and stops. So each boundary needs to line up with the vehicle’s actual route, not a rough guess. Once those boundaries are in place, you can pair them with the right time windows.
Commute corridors are the repeat travel paths your fleet covers during peak hours. Build them by tracing real traffic flow, not straight-line distance. That sounds simple, but it changes a lot. A route that looks close on a map may move through totally different streets in practice.
GPS-based platforms can keep corridor boundaries tight enough to match real vehicle paths. That helps you follow where passengers and people nearby actually see the screen while the vehicle is moving.
For event locations, a radius geofence is often the best place to start. It covers the area people can reach on foot from the venue. If fans leave a stadium and spill into nearby blocks, that radius can catch that movement.
Still, radius geofences aren’t always a clean fit. Some venues sit inside uneven street grids or have blocked access points that change how traffic moves. In those cases, draw the boundary around the vehicle’s real footprint instead of relying on a simple circle.
Pickup locations work differently. At airport arrival curbs, vehicles often idle instead of passing through. That makes precision more important. Use tight polygons for arrivals lanes and pickup bays.
A broad airport radius can pull in passing traffic that never has a chance to see the ad for long. Smaller zones cut waste and improve dwell-time targeting. These pickup zones tend to work best when the vehicle slows down or stops long enough for the ad to register. That becomes even more important when motion triggers control whether the screen plays.
| Zone Type | Best Fit | Boundary Logic |
|---|---|---|
| Route Corridor | Commute paths, highway loops | Traffic flow and transit routes |
| Radius Geofence | Event perimeters, stadiums, arenas | Area people can reach on foot from the venue |
| Custom Polygon | Airports, hotels, irregular districts | Precise footprint around specific lanes or bays |
With zones mapped, the next layer is daypart timing.
Once your zones are mapped, set time rules. Geo decides where an ad can run. Daypart decides when it should run. From there, line up each schedule with the screen’s motion state.
For weekday commute windows, use 6:30 AM–9:30 AM and 4:00 PM–7:00 PM, Monday through Friday. Set each schedule in the local time of the city where the screen operates, so timing stays lined up across U.S. time zones.
Use a separate weekend profile for leisure, shopping, nightlife, and event demand.
Event campaigns usually work best when you split the schedule into three phases: pre-event arrival, live-event, and post-event exit.
The pre-event arrival window is the period when traffic starts building toward the venue. That’s the right time for arrival offers tied to the location.
During the event itself, cut frequency or pause delivery until exit traffic starts to build again. Preload the post-event window so vehicle screens can switch fast.
Then motion rules decide whether playback starts.
Not every ad fits every time slot. Match the creative to what people are likely doing in that moment - for example, lunch offers during midday blocks or nightlife promotions during late-night and weekend windows.
| Daypart Block | Time Window | Audience Intent | Creative Focus |
|---|---|---|---|
| Morning Commute | 6:30 AM–9:30 AM | Workforce transit | Coffee, transit apps, news |
| Midday | 11:00 AM–2:00 PM | Lunch, errands | Food offers, retail, delivery |
| Evening Commute | 4:00 PM–7:00 PM | Homebound workers | Dinner, grocery, entertainment |
| Late Night | Late-night window | Nightlife, bar exits | Rideshare, fast food, events |
| Weekend Block | Weekend hours | Leisure, shopping | Retail, dining, local events |
With geo zones and daypart schedules already set, the next move is to tie those rules to what actually plays on each screen. Motion rules are what connect zone and schedule logic to playback.
After your zones and schedules are in place, set the trigger states that control playback. Start with two core states: moving and idle. Then map different creatives to each one.
When a vehicle is moving, rooftop screens can run short commute ads. When the vehicle slows down or sits idle, the system can switch to longer in-car messaging. In-car tablets can also trigger playback based on passenger detection or zone entry. To help protect the vehicle battery, use power-off rules tied to engine status. Pair that with auto-start tied to the vehicle ignition, so the screen turns on when the driver gets back on the road.
The goal is simple: use motion rules so each screen matches the current exposure state.
Once the trigger logic is set, the next job is matching each creative to the screen and viewing context.
Rooftop LED screens and in-car tablets serve very different viewing moments. That means the creative logic should be different too.
| Screen Type | Primary Audience | Creative Focus |
|---|---|---|
| Rooftop LED | Pedestrians and other drivers | Short-read, high-impact visuals |
| In-Car Tablet | Seated passengers | Longer-form, interactive content |
For pacing, use 10-second static creatives and 20-second video creatives. Rooftop screens work best with short, high-contrast creative that can be read fast. In-car tablets have more room for longer interactive or context-based messages because passengers have more time to look.
For in-car screens, a front-facing camera can detect passenger presence and trigger playback only when a passenger is detected. On first detection, show a brief privacy notice.
Managing motion rules one vehicle at a time doesn’t scale. Enroute View Media’s cloud-based platform syncs rule updates to devices across a full fleet within minutes. Rooftop screens and in-car tablets are controlled separately, so a change to one screen type won’t affect the other.
Reporting includes:
You can also track device health and offline alerts in real time.
With playback rules in place, the next step is validation and performance tracking.
Once your geo zones, dayparts, and motion triggers are live, don’t just assume everything is working. Check each rule before the first run.
After you set playback rules, test them before launch. Even with sub-meter GPS, you still need to confirm each geofence boundary in the field. Use the real-time monitoring tool to review live screen captures and make sure the right creative fires in the right zone. Also, test rooftop and in-car playback separately, because each one follows different motion logic.
"Real-time device monitoring: See if screens are online, view screenshots, and get alerts for offline devices." - Enroute View Media
Then check the CMS time-zone settings. This step is easy to miss, but it matters. If the time zone is off, your ads may trigger in the right place at the wrong time.
Once the campaign goes live, review playback verification reports. These checks help you tell the difference between a rule problem and normal delivery behavior.
| Metric | What to Check | Why It Matters |
|---|---|---|
| GPS Coordinates | Match against geofence boundaries | Catches ads firing outside intended zones |
| Timestamps | Compare against daypart schedule | Confirms correct commute or event windows |
| Impressions | Review by screen type and motion condition | Helps verify motion-triggered delivery |
| Online Status | Monitor active time during peak windows | Spots connectivity gaps affecting delivery |
If a commute corridor is underdelivering, look at whether the screen stays online during peak hours. If an event zone keeps overdelivering after the event ends, tighten the schedule so delivery stops at the expected exit window. And if fill rates look low at the start, that may just be normal ramp-up, not a rule issue.
Geo-time logic helps tighten reach, cut waste, and keep each screen aligned with the moment. Each layer narrows delivery by place, time, and movement, which means less spillover and better control over budget.
Geo-time rules and motion triggers work side by side in the Enroute View Media DigiStream system. The platform uses GPS to place virtual boundaries around set locations, then pairs that location data with time-based targeting. The result is simple: ads appear based on a vehicle’s exact position and the time of day.
Motion triggers add one more layer of precision. When the system detects a passenger, it can activate specific content right away. That helps serve messages that fit the moment instead of showing the same ad on repeat.
Run ads by pairing geofencing with time-based scheduling. That way, content shows up on its own when a vehicle enters a set area at the right moment.
For example, you can run ads in business districts during peak morning and evening commute windows. You can also serve them in event zones and high-demand pickup areas like airports. The result is simple: your message appears where it makes the most sense, when people are most likely to notice it.
Rooftop screens and in-car tablets operate as separate units in the Enroute View Media system. That means each one can follow trigger rules that fit where it’s used.
Rooftop LED screens are made for outdoor viewing, so they usually rely on GPS-based geofencing to display content tied to a specific location. In-car tablets are aimed at passenger attention, and they can use audience detection, like front-facing cameras, to confirm that a rider is present before an ad appears.
Need pricing details?
EnrouteViewMedia is a Canadian technology company based in Edmonton, Alberta, Canada. The company was founded by a group of media entrepreneurs and engineering executives. Our mission is developing leading-edge digital media display technologies for taxicab rooftops and taxicab interiors advertising market. Through our easy to use ad delivery and management system, we assist our clients in reaching their customers with targeted exposure. EnRouteViewMedia continuously strives to be the global leader in digital geo-time targeted advertising media systems for modern taxi fleets.